

Cara Install WordPress di VPS Ubuntu. Di artikel kali ini saya akan membahas mengenai bagaimana cara memasang CMS WordPress di VPS Ubuntu. WorPress sendiri merupakan salahsatu CMS populer yang bisa digunakan untuk berbagai macam kebutuhan dari blog pribadi sampai situs jual beli.
Untuk tutorial ini yang dibutuhkan adalah VPS atau server dengan sistem operasi Ubuntu. Nantinya kita akan menggunakan web server Nginx dan PHP versi 7.4. Semua proses dilakukan secara manual, tanpa bantuan script seperti Easy Engine, maupun panel.
Untuk memulai tutorial ini pastikan kalian memiliki hak akses sudo atau root di server yang akan dipasang WordPress.
Install Nginx
Karena biasanya versi Nginx dari repository Ubuntu tertinggal jauh dari versi stable Nginx, kita akan gunakan repository milik Nginx.
Tambahkan repository Nginx dengan perintah:
echo -e \
"deb [arch=amd64] http://nginx.org/packages/ubuntu/ $(lsb_release -cs) nginx\n\
#deb-src [arch=amd64] http://nginx.org/packages/ubuntu/ $(lsb_release -cs) nginx" | \
sudo tee /etc/apt/sources.list.d/nginx.list
Tambahkan key milik Nginx agar tidak error ketika proses install.
wget -q "http://nginx.org/packages/keys/nginx_signing.key" -O-| sudo apt-key add -
Lanjut install Nginx dengan perintah
sudo apt update && sudo apt install nginx
Sementara kita lanjut install PHP dulu. Konfigurasi Nginx dilakukan nanti.
Install PHP 7.4
Seperti Nginx, versi PHP di repository Ubuntu juga tertinggal. Kita akan gunakan repository PPA dari Ondřej Surý.
sudo apt-get install -y software-properties-common
sudo add-apt-repository ppa:ondrej/php
sudo apt-get update
Selanjutnya kita install PHP dan juga modul yang nantinya dibutuhkan oleh WordPress.
sudo apt install php-common php-pear php7.4-cli php7.4-common php7.4-curl php7.4-fpm \
php7.4-gd php7.4-igbinary php7.4-json php7.4-mbstring php7.4-mysql php7.4-opcache \
php7.4-readline php7.4-xml php7.4-zip php7.4-imagick
Install MariaDB
Untuk server database kita menggunakan MariaDB.
sudo apt-get install mariadb-server mariadb-client
Selanjutnya kita jalankan perintah berikut untuk menghapus user anonymous, menghapus database test, maupun menonaktifkan fitur remote login.
sudo mysql_secure_installation
Contoh output ketika menjalankan perintah diatas:
zero-two@linuxsec:~$ sudo mysql_secure_installation
[sudo] password for zero-two:

NOTE: RUNNING ALL PARTS OF THIS SCRIPT IS RECOMMENDED FOR ALL MariaDB
      SERVERS IN PRODUCTION USE!  PLEASE READ EACH STEP CAREFULLY!

In order to log into MariaDB to secure it, we'll need the current
password for the root user.  If you've just installed MariaDB, and
you haven't set the root password yet, the password will be blank,
so you should just press enter here.

Enter current password for root (enter for none):
OK, successfully used password, moving on...

Setting the root password ensures that nobody can log into the MariaDB
root user without the proper authorisation.

You already have a root password set, so you can safely answer 'n'.

Change the root password? [Y/n] y
New password:
Re-enter new password:
Password updated successfully!
Reloading privilege tables..
 ... Success!


By default, a MariaDB installation has an anonymous user, allowing anyone
to log into MariaDB without having to have a user account created for
them.  This is intended only for testing, and to make the installation
go a bit smoother.  You should remove them before moving into a
production environment.

Remove anonymous users? [Y/n] y
 ... Success!

Normally, root should only be allowed to connect from 'localhost'.  This
ensures that someone cannot guess at the root password from the network.

Disallow root login remotely? [Y/n] y
 ... Success!

By default, MariaDB comes with a database named 'test' that anyone can
access.  This is also intended only for testing, and should be removed
before moving into a production environment.

Remove test database and access to it? [Y/n] y
 - Dropping test database...
 ... Success!
 - Removing privileges on test database...
 ... Success!

Reloading the privilege tables will ensure that all changes made so far
will take effect immediately.

Reload privilege tables now? [Y/n] y
 ... Success!

Cleaning up...

All done!  If you've completed all of the above steps, your MariaDB
installation should now be secure.

Thanks for using MariaDB!
Oke selanjutnya adalah tahap mempersiapkan database untuk WordPress.
Mempersiapkan Database
Selanjutnya adalah tahap mempersiapkan database WordPress.
sudo mysql -u root
Lalu jalankan command
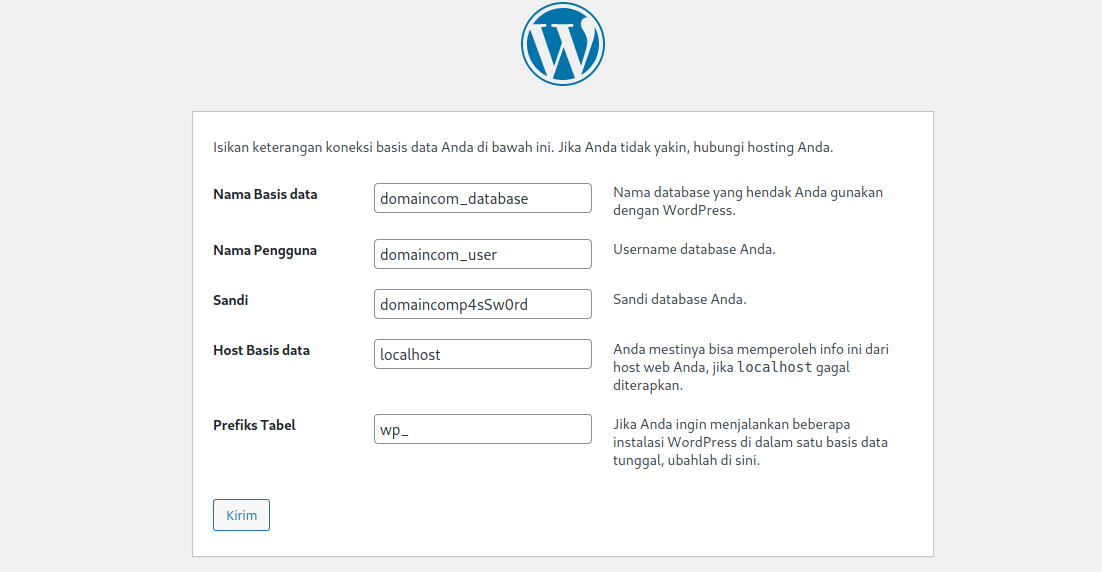
create database domaincom_database;
CREATE USER 'domaincom_user'@'localhost' IDENTIFIED BY 'domaincomp4sSw0rd';
GRANT ALL ON domaincom_database.* TO 'domaincom_user'@'localhost';
Untuk nama database, user database, maupun password silahkan diubah sendiri.
Konfigurasi Nginx dan SSL
Di tahap ini kita akan mulai mengkonfigurasi agar domain dan web server Nginx terhubung, dan juga menambahkan SSL dari Let’s Encrypt. Saya asumsikan kalian sudah mengarahkan A record dari DNS manager domain ke IP VPS sehingga kita akan langsung mulai ke konfigurasi Nginx.
Konfigurasi virtual host dari Nginx yang diinstall menggunakan repository nginx.org (cara yang kita pakai diatas) terletak di /etc/nginx/conf.d sementara webroot berlokasi di /usr/share/nginx/. Kita akan mulai konfigurasinya darisitu.
Buat terlebih dahulu webroot nya.
sudo mkdir /usr/share/nginx/domain.com
sudo chown -R www-data:www-data /usr/share/nginx/domain.com
Selanjutnya kita buat file virtual hostnya.
sudo nano /etc/nginx/conf.d/domain.com.conf
Isinya:
server {
	listen         80;
	server_name    domain.com;

	access_log /var/log/nginx/domain.com-access.log;
	error_log /var/log/nginx/domain.com-error.log;

# HTTP Security Headers
	add_header X-Content-Type-Options nosniff;
	add_header Referrer-Policy "no-referrer";
	add_header Cache-Control "public";
	add_header X-Frame-Options SAMEORIGIN;
	add_header X-XSS-Protection "1; mode=block";
	add_header Strict-Transport-Security "max-age=31536000; includeSubDomains; preload";

# Webroot location
	root /usr/share/nginx/domain.com;

	index index.php index.html index.htm;
        location / {
                try_files $uri $uri/ /index.php?$args;
        }

# Error page handling
	error_page 404 /404.html;
	error_page 500 502 503 504 /50x.html;
	location = /50x.html {
        root /usr/share/nginx/html;
	}

# FastCGI tweak
	location ~ \.php$ {
		fastcgi_pass unix:/run/php/php7.4-fpm.sock;
		fastcgi_index   index.php;
		fastcgi_param   SCRIPT_FILENAME  $document_root$fastcgi_script_name;
		include         fastcgi_params;
		fastcgi_split_path_info ^(.+\.php)(/.+)$;
		set $path_info $fastcgi_path_info;
		fastcgi_param PATH_INFO $path_info;
	}

# Disable htaccess
	location ~ /\.ht {
		deny all;
	}

# For Let's Encrypt verification
	location ~ /.well-known {
		allow all;
	}

# RSS caching
        location ~* \.(?:rss|atom)$ {
		expires 1h;
        }
# Media caching
        location ~* \.(?:jpg|jpeg|gif|png|ico|cur|gz|svg|svgz|mp4|ogg|ogv|webm|htc)$ {
		expires 30d;
		access_log off;
        }
# Static files caching
        location ~* \.(?:css|js)$ {
		expires 1y;
		access_log off;
        }

}
Cek terlebih dahulu apakah ada yang error dengan perintah
sudo nginx -t
Jika tidak ada error, kita restart Nginx dengan perintah
sudo service nginx restart
Selanjutnya adalah memasang SSL untuk domain kita. Disini kita bisa gunakan certbot. Jika belum diinstall, kalian bisa install terlebih dahulu dengan perintah
sudo apt-get install certbot -y
Lalu generate certificatenya dengan perintah:
sudo certbot certonly -a webroot --webroot-path=/usr/share/nginx/domain.com -d domain.com --email email@domain.com --agree-tos --rsa-key-size 4096
Contoh outputnya:
Saving debug log to /var/log/letsencrypt/letsencrypt.log
Plugins selected: Authenticator webroot, Installer None
Obtaining a new certificate
Performing the following challenges:
http-01 challenge for domain.com
Using the webroot path /usr/share/nginx/domain.com for all unmatched domains.
Waiting for verification...
Cleaning up challenges

IMPORTANT NOTES:
 - Congratulations! Your certificate and chain have been saved at:
   /etc/letsencrypt/live/domain.com/fullchain.pem
   Your key file has been saved at:
   /etc/letsencrypt/live/domain.com/privkey.pem
   Your cert will expire on 2021-11-03. To obtain a new or tweaked
   version of this certificate in the future, simply run certbot
   again. To non-interactively renew *all* of your certificates, run
   "certbot renew"
 - If you like Certbot, please consider supporting our work by:

   Donating to ISRG / Let's Encrypt:   https://letsencrypt.org/donate
   Donating to EFF:                    https://eff.org/donate-le
Oke sekarang kita sudah memiliki file certificate yang berlokasi di /etc/letsencrypt/live/domain.com/.
Generate dulu SSL dhparam dengan perintah
sudo openssl dhparam -dsaparam -out /etc/ssl/certs/dhparam.pem 4096
Lalu kita edit lagi file virtual host Nginx untuk mengaktifkan SSL nya.
echo "" | sudo tee /etc/nginx/conf.d/domain.com.conf
sudo nano /etc/nginx/conf.d/domain.com.conf
Lalu ubah menjadi:
server {
        listen         80;
        server_name    domain.com;
        return         301 https://$server_name$request_uri;
}
server {
        listen 443 ssl;
        server_name    domain.com;
        ssl_dhparam /etc/ssl/certs/dhparam.pem;

        ssl_protocols TLSv1.2 TLSv1.3;
        ssl_ciphers ECDHE-ECDSA-AES128-GCM-SHA256:ECDHE-RSA-AES128-GCM-SHA256:ECDHE-ECDSA-AES256-GCM-SHA384:ECDHE-RSA-AES256-GCM-SHA384:ECDHE-ECDSA-CHACHA20-POLY1305:ECDHE-RSA-CHACHA20-POLY1305:DHE-RSA-AES128-GCM-SHA256:DHE-RSA-AES256-GCM-SHA384;
        ssl_prefer_server_ciphers on;

        resolver 1.1.1.1 valid=300s;
        ssl_session_timeout  10m;
        ssl_session_cache shared:SSL:10m;
        ssl_session_tickets off;
        ssl_early_data off;
        resolver_timeout 5s;

# SSL Certificate Location
        ssl_certificate /etc/letsencrypt/live/domain.com/fullchain.pem;
        ssl_certificate_key /etc/letsencrypt/live/domain.com/privkey.pem;
        ssl_trusted_certificate /etc/letsencrypt/live/domain.com/fullchain.pem;

# Enable SSL OCSP Stapling
        ssl_stapling on;
        ssl_stapling_verify on;

# Access log location
        access_log /var/log/nginx/domain.com-access.log;
        error_log /var/log/nginx/domain.com-error.log;

# HTTP Security Headers
        add_header X-Content-Type-Options nosniff;
        add_header Referrer-Policy "no-referrer";
        add_header Cache-Control "public";
        add_header X-Frame-Options DENY;
        add_header X-XSS-Protection "1; mode=block";
        add_header Strict-Transport-Security "max-age=31536000; includeSubDomains; preload";

# Webroot location
        root /usr/share/nginx/domain.com;

        index index.php index.html index.htm;
        location / {
                try_files $uri $uri/ /index.php?$args;
        }

# Error page handling
        error_page 404 /404.html;
        error_page 500 502 503 504 /50x.html;
        location = /50x.html {
        root /usr/share/nginx/html;
        }

# FastCGI tweak
        location ~ \.php$ {
                fastcgi_pass unix:/run/php/php7.4-fpm.sock;
                fastcgi_index   index.php;
                fastcgi_param   SCRIPT_FILENAME  $document_root$fastcgi_script_name;
                include         fastcgi_params;
                fastcgi_split_path_info ^(.+\.php)(/.+)$;
                set $path_info $fastcgi_path_info;
                fastcgi_param PATH_INFO $path_info;
        }

# Disable htaccess
        location ~ /\.ht {
                deny all;
        }

# For Let's Encrypt verification
        location ~ /.well-known {
                allow all;
        }

# RSS caching
        location ~* \.(?:rss|atom)$ {
                expires 1h;
        }
# Media caching
        location ~* \.(?:jpg|jpeg|gif|png|ico|cur|gz|svg|svgz|mp4|ogg|ogv|webm|htc)$ {
                expires 30d;
                access_log off;
        }
# Static files caching
        location ~* \.(?:css|js)$ {
                expires 1y;
                access_log off;
        }

}
Simpan lalu cek apakah ada error di konfigurasinya.
sudo nginx -t
Jika semuanya sudah oke, kita restart Nginx dengan perintah:
sudo service nginx restart
Cek domain.com di browser. Jika diredirect ke https://domain.com tanpa error, kita bisa lanjut ke instalasi WordPress.
Instalasi WordPress
Sekarang kita sudah siap untuk memasang WordPress di VPS Ubuntu. Masuk ke direktori webroot domain kita lalu download file installer WordPress.
cd /usr/share/nginx/domain.com
wget https://id.wordpress.org/latest-id_ID.zip && unzip latest-id_ID.zip
rm latest-id_ID.zip
mv wordpress/* .
rm -rf wordpress/
cd ..
chown -R www-data:www-data domain.com
Sekarang akses url berikut melalui browser.
https://domain.com/wp-admin/setup-config.php
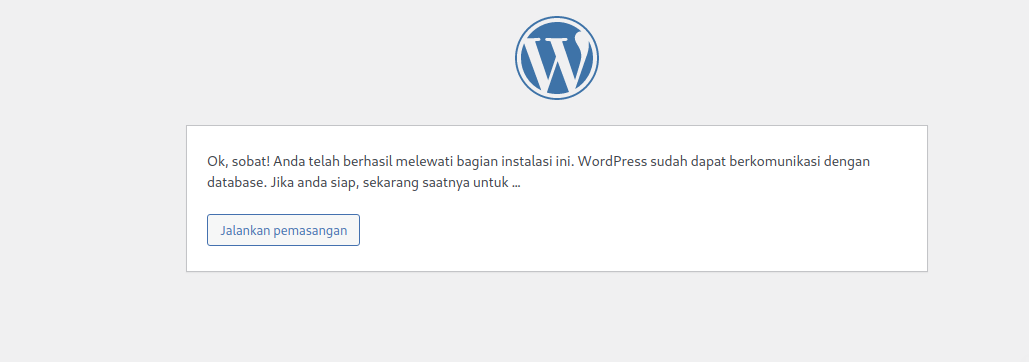
Lalu ikuti proses instalasinya hingga selesai.
Masukkan nama database, username database, dan password database yang sudah kita persiapkan diatas.

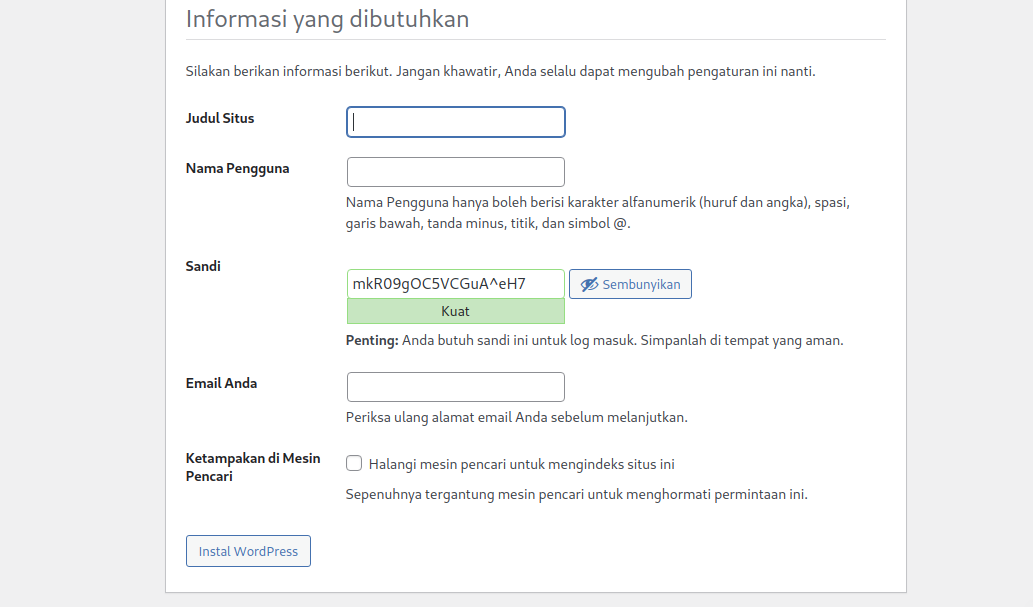
Jika semuanya benar, kalian akan dialihkan ke halaman setup identitas situs seperti nama situs, username untuk login ke blog maupun password. Di tahap ini kalian bisa (dan dianjurkan) mengatur user dan password yang berbeda dari kredensial database.


Selesai.
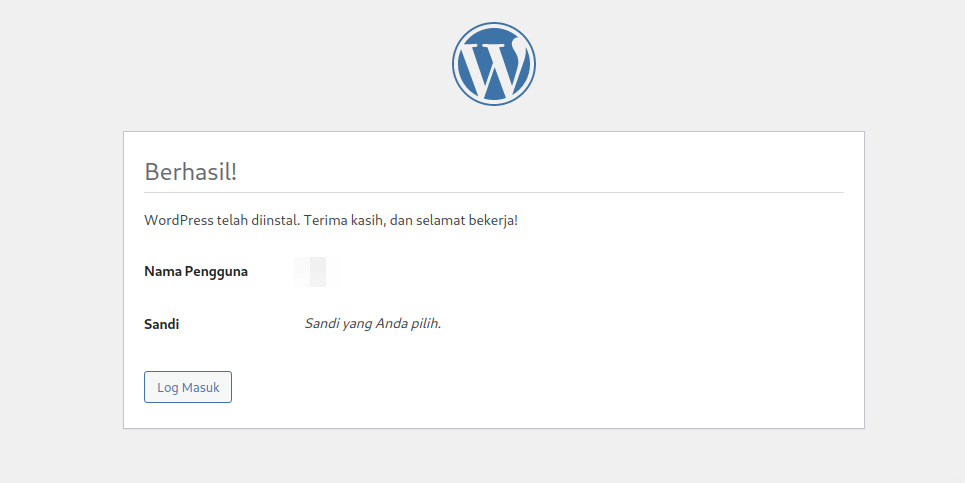

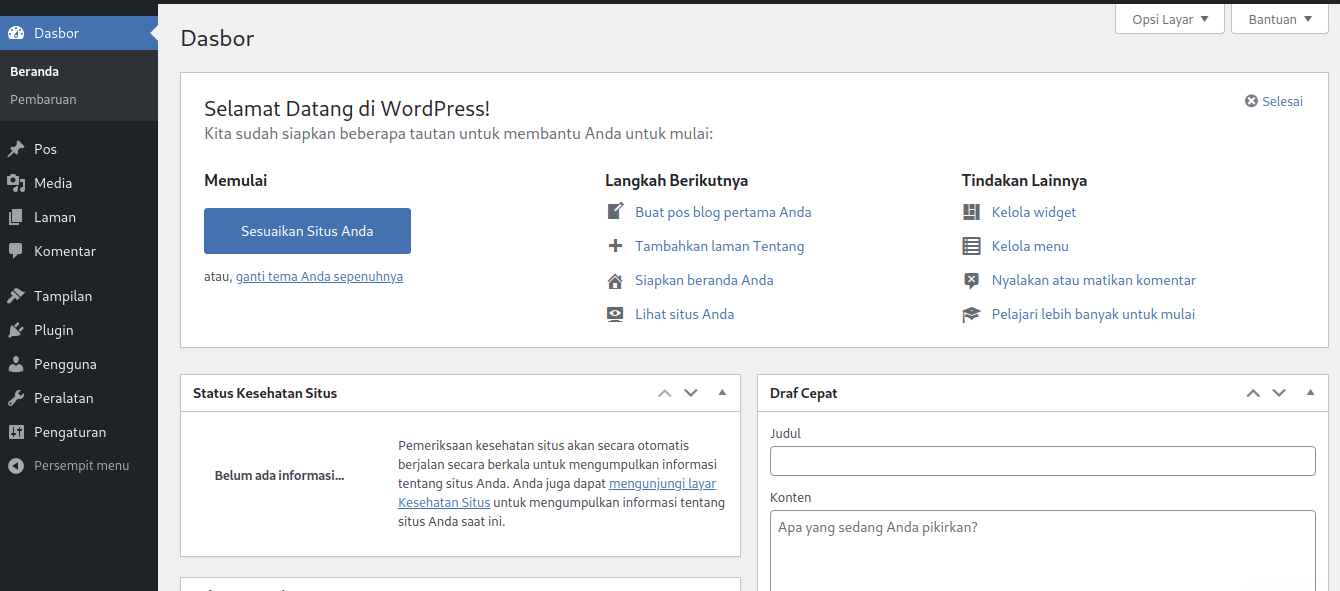
Selanjutnya kalian bisa login ke halaman admin WordPress melalui url domain.com/wp-login.php. Gunakan username dan password yang sudah diatur di step sebelumnya. Jika kredensialnya benar, maka kalian akan diarahkan ke halaman dashboard.

Oke selesai. Mungkin sekian tutorial kali ini. Jika ada yang ingin ditanyakan bisa tinggalkan komentar.


